Enjoy sharper photos with these 3 uncommon tips.
Sharpen your skills for sharper photos
Sharp photos is like flour for baking a cake, if the photo is not sharp it will generally meet its fate in the Windows/Mac recycle bin and safe to say a cake without flour has the same ending. How do we increase the percentage of photos being sharp? Not all photos will turn out sharp due to limitations in cameras and technology but the ultimate goal is have a high success rate. There is nothing worse when that rare moment presents its self only to be captured with a blurry photo that ends up you now where.
Less zoom = more sharpness
Zooming in and enlarging any subject we are shooting is generally fantastic, meaning that bird is going to look bigger and have a greater visual impact, or that flower in the photo looks so close you can almost touch it. The downside at times is part of the bird or flower will not be in focus and zooming out a little can help to fix this issue.
The more you zoom in with your lens the depth of field becomes shallower or in other words the blurrier the background becomes and the cameras auto focus may think the edge of the birds wing is the background and blur this out while the rest of the bird is in focus. Zooming out a little will help the camera distinguish between the subject and background which will better outline the subject so all of it is in focus.
Yes the subject will be smaller in result of zooming out, the photo can be cropped to achieve the composition you are looking for. Provided we are only zooming out a little the extra cropping required should not have a huge impact on the overall resolution quality.
contrast based auto focus
Most professional cameras use a contrast based autofocus system, whereby the camera is detecting a subject by hunting for the outline of the subject using contrast. An example if you lock on to a white bird with a blue background the camera will detect there is a sharp contrast between the white bird and blue background then begin to map out the edge of the bird and make everything within this edge in focus. Zooming out can help to provide more contrast between the subject and background.

2 photos is better than 1
A potential problem we can encounter when photographing two animals side by side is only one of them is sharp and the other is blurry, however there is a way this can be overcome.
When photographing the two animals the auto focus icon will have to be on one of the animals and generally you hope the camera will capture the other in focus (the more zoomed in you are the less likely both will be sharp). A way to have both in focus is to lock the auto focus onto the first animal and take a picture, then move the autofocus onto the second animal without moving the camera too much and capture the second photo. Now afterwards we can apply some magic and combine both photos in photoshop and create the 1 photo with both animals looking sharp.

3. Aperture Sweet Spot
Zoom lenses will have an aperture that is considered as the sweet spot where this particular aperture will produce the sharpest photo of a subject assuming lighting and background blur is not a necessary factor.
With zoom lenses generally speaking your sharpest aperture will be your lowest f stop + 2 or 3 natural f stops (natural f stop scale is f/1, f/1.4, f/2, f/2.8, f/4, f/5.6, f/8, f/11, f/16 and f/22), camera manufactures may add more interval f stops. Natural f stops are f stops that doubles the amount of light entering the lens compared to the previous f stop.
Why one aperture is the sharpest
Colour aberration: this is the lens inability to correctly get all colours in focus and is more likely to happen on small f stops, as more light enters the camera a greater amount is passing through the edges of the lens where most of the aberration is caused.
Diffraction: this occurs more so with higher f stops becuase a higher percentage of light entering the lens is passing by the edges of the aperture opening where diffraction is most susceptible, this is because light interacts with the steel edges of the aperture causing light to slightly bend.
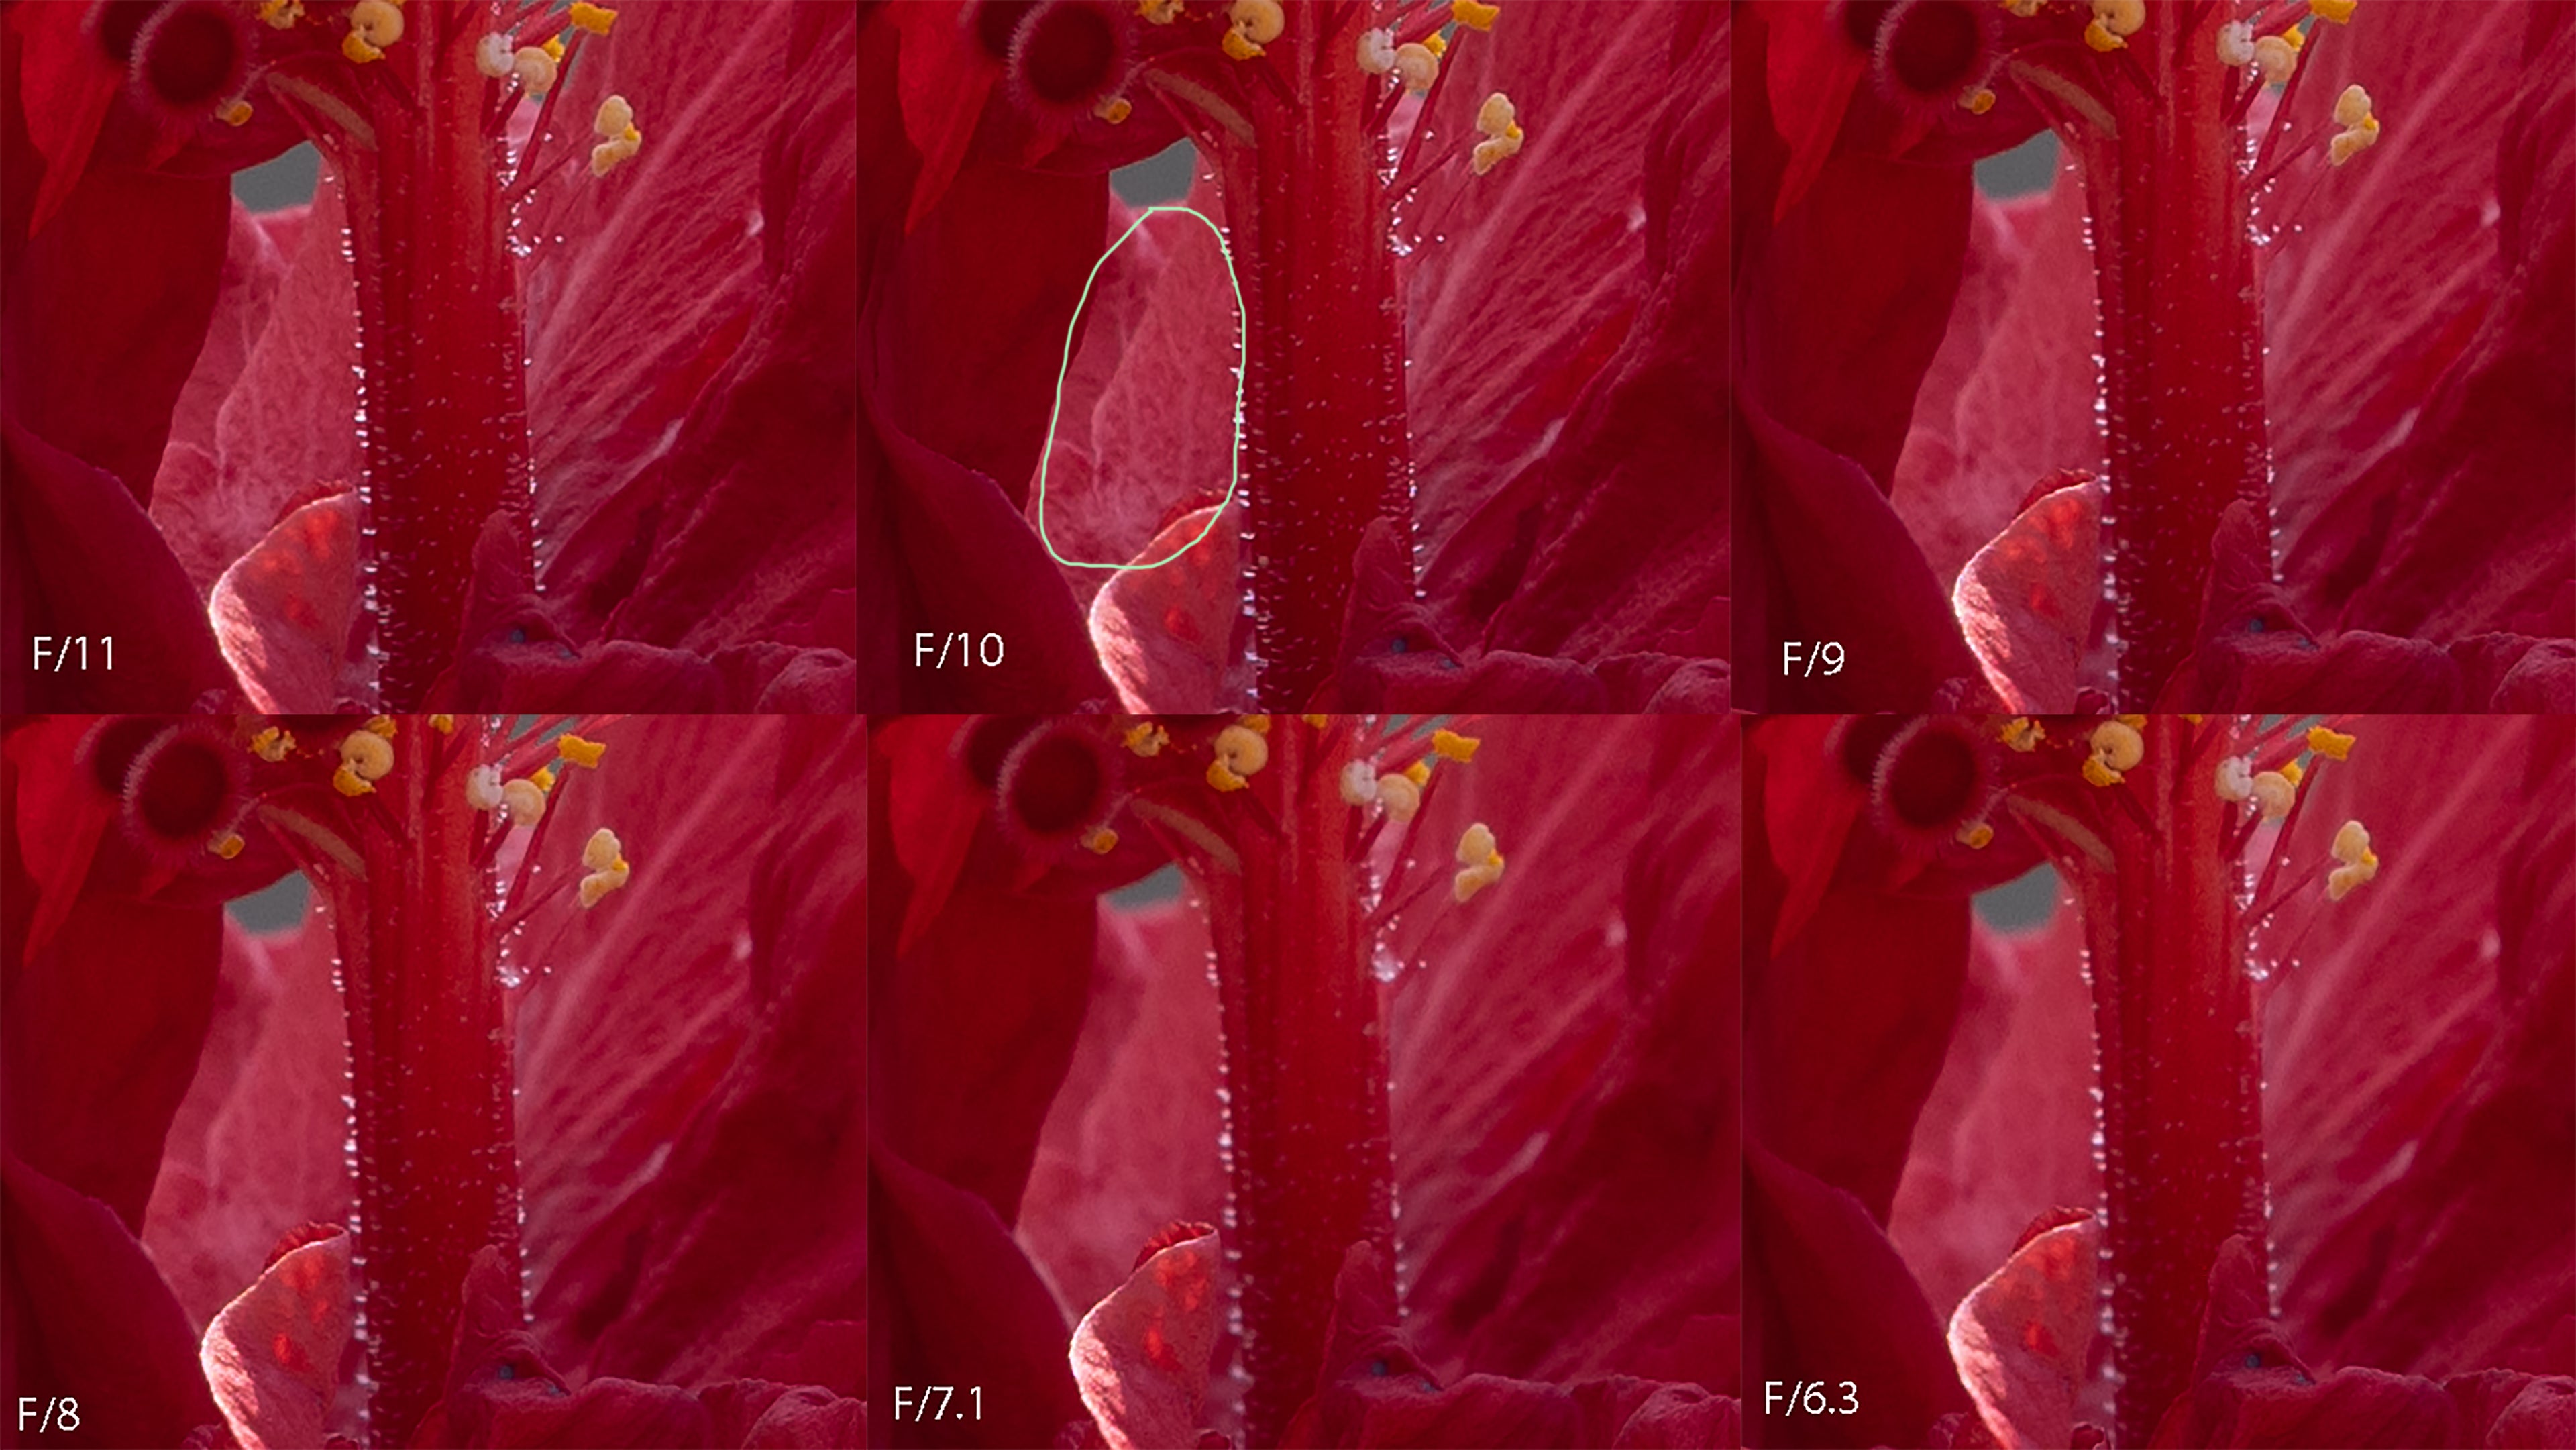
The picture above contains 6 different pictures of the same flower shot at different f stop numbers. These photos were taken on my canon R5 with a 70- 200mm f4 RF lens. When analysing which photo has the greatest amount of detail we are hunting for which photo has the greatest amount of contrast. The photo taken at F/10 produced the sharpest image as we can see particularly in the highlighted section there is a greater amount of contrast between the light and dark areas compared to the rest. Overall f/10 is the sweet spot aperture on this lens and would the aperture of choice if I did not require a shallow depth of field or lower f stop to compensate for a low light setting.
comment below in english, french, spanish or another language about your experience, opinion, a question you may have, or to show support.
