Cinematic
Cute cat videos will provide that needed dopamine release, yet when the mood requires a walk on the wild side cinematic photos is the correct pathway. There is a science behind what makes a photo look cinematic and this is resounded throughout Hollywood. The cuddly cat videos have been transformed into a Catwoman motion picture and now let's begin to uncover the secrets of cinematic editing.
All photo edits have been completed using Lightroom and Photoshop.
Secret Colours
Teal & orange, teal & orange, teal & orange. These two colours are the secret ingredients to producing cinematic images, it's simple yet instinctively not a common colour grade. Teal and orange are opposites on the colour wheels which is why they mix harmoniously together.
The standard application of these two colours is to apply a blueish teal to the shadows and orange to the highlights of the photo/video.
The teal can also expand to a more standard blue colour or contain a green tint depending on what the editor deems fit. The orange colour can vary leaning either towards a reddish or yellow colour at times.
The colours can also be flipped in their application to light and shadows where the teal is occupying the highlights and orange reserved for the shadows. There is no set rule which is great for experimental editing.
Colour Editing
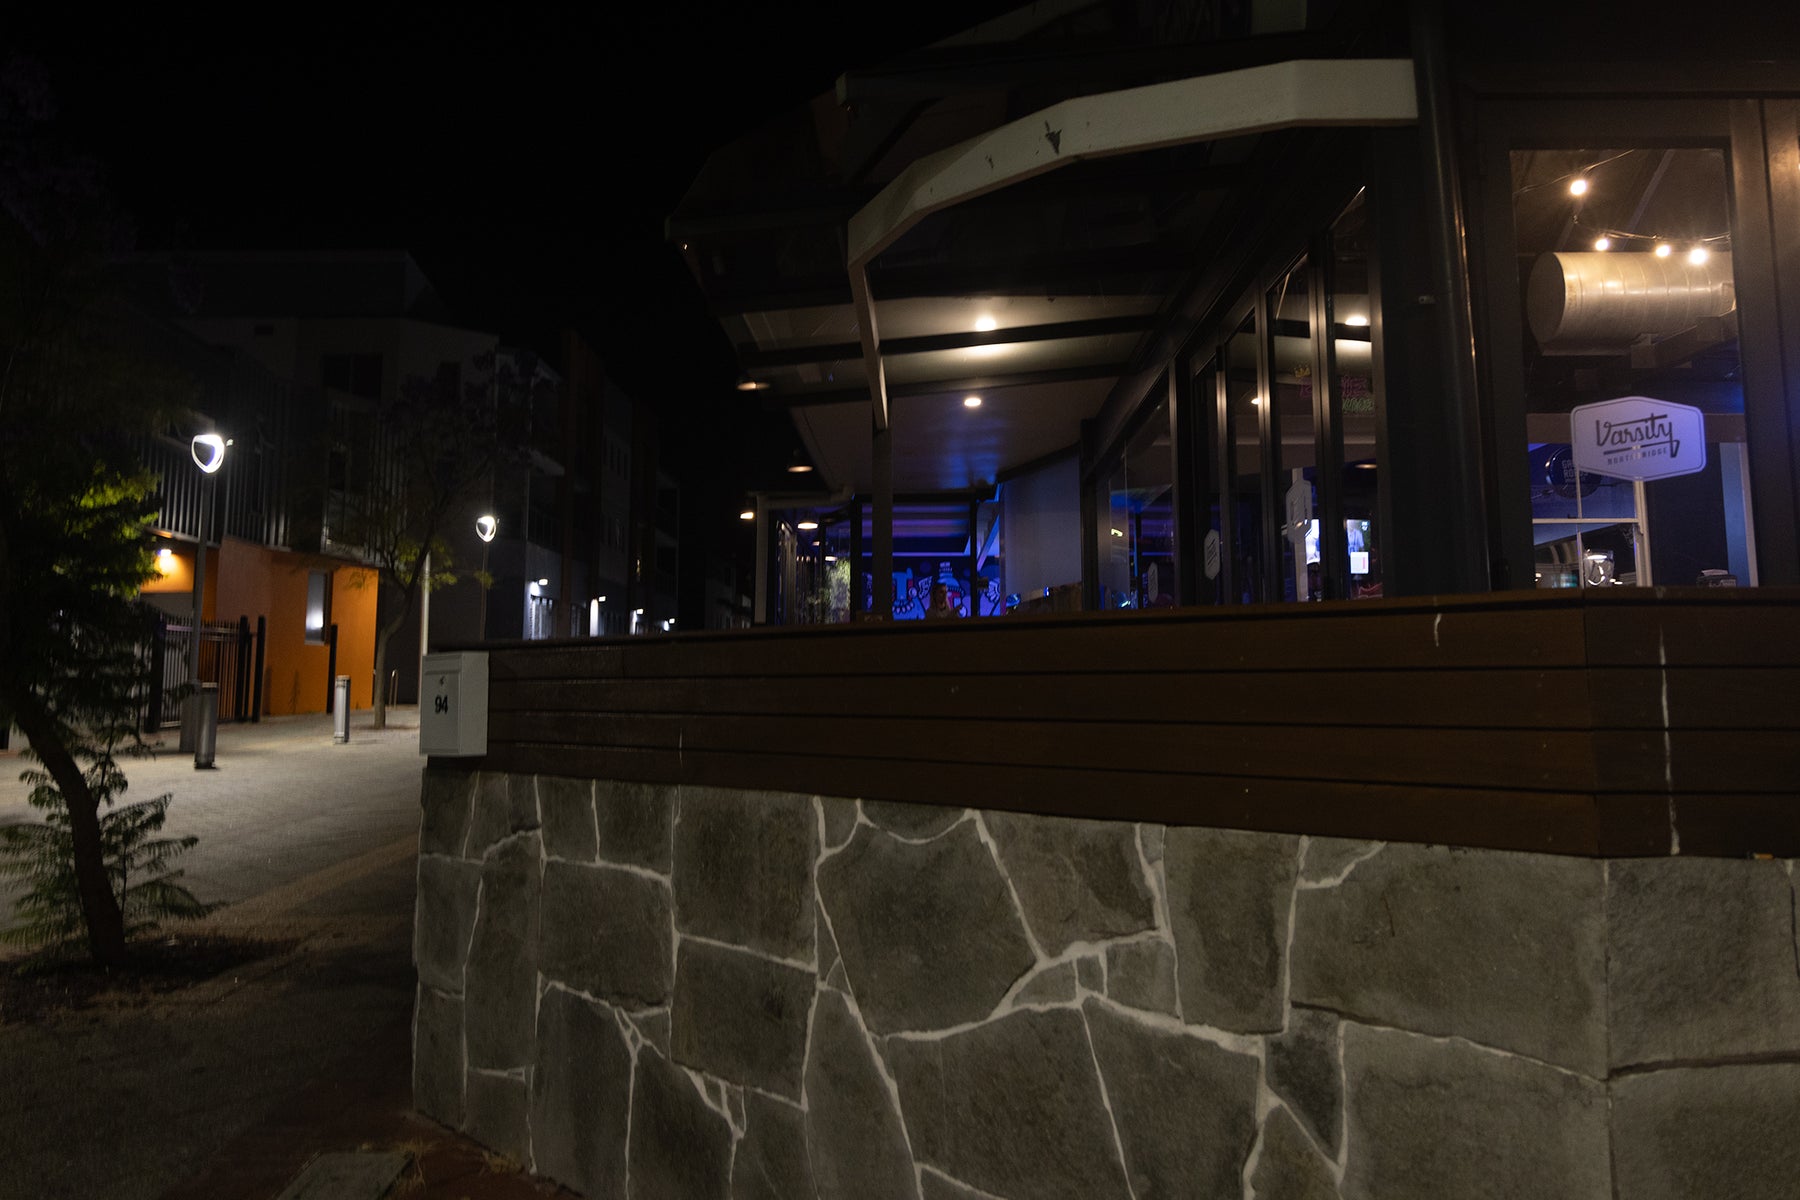
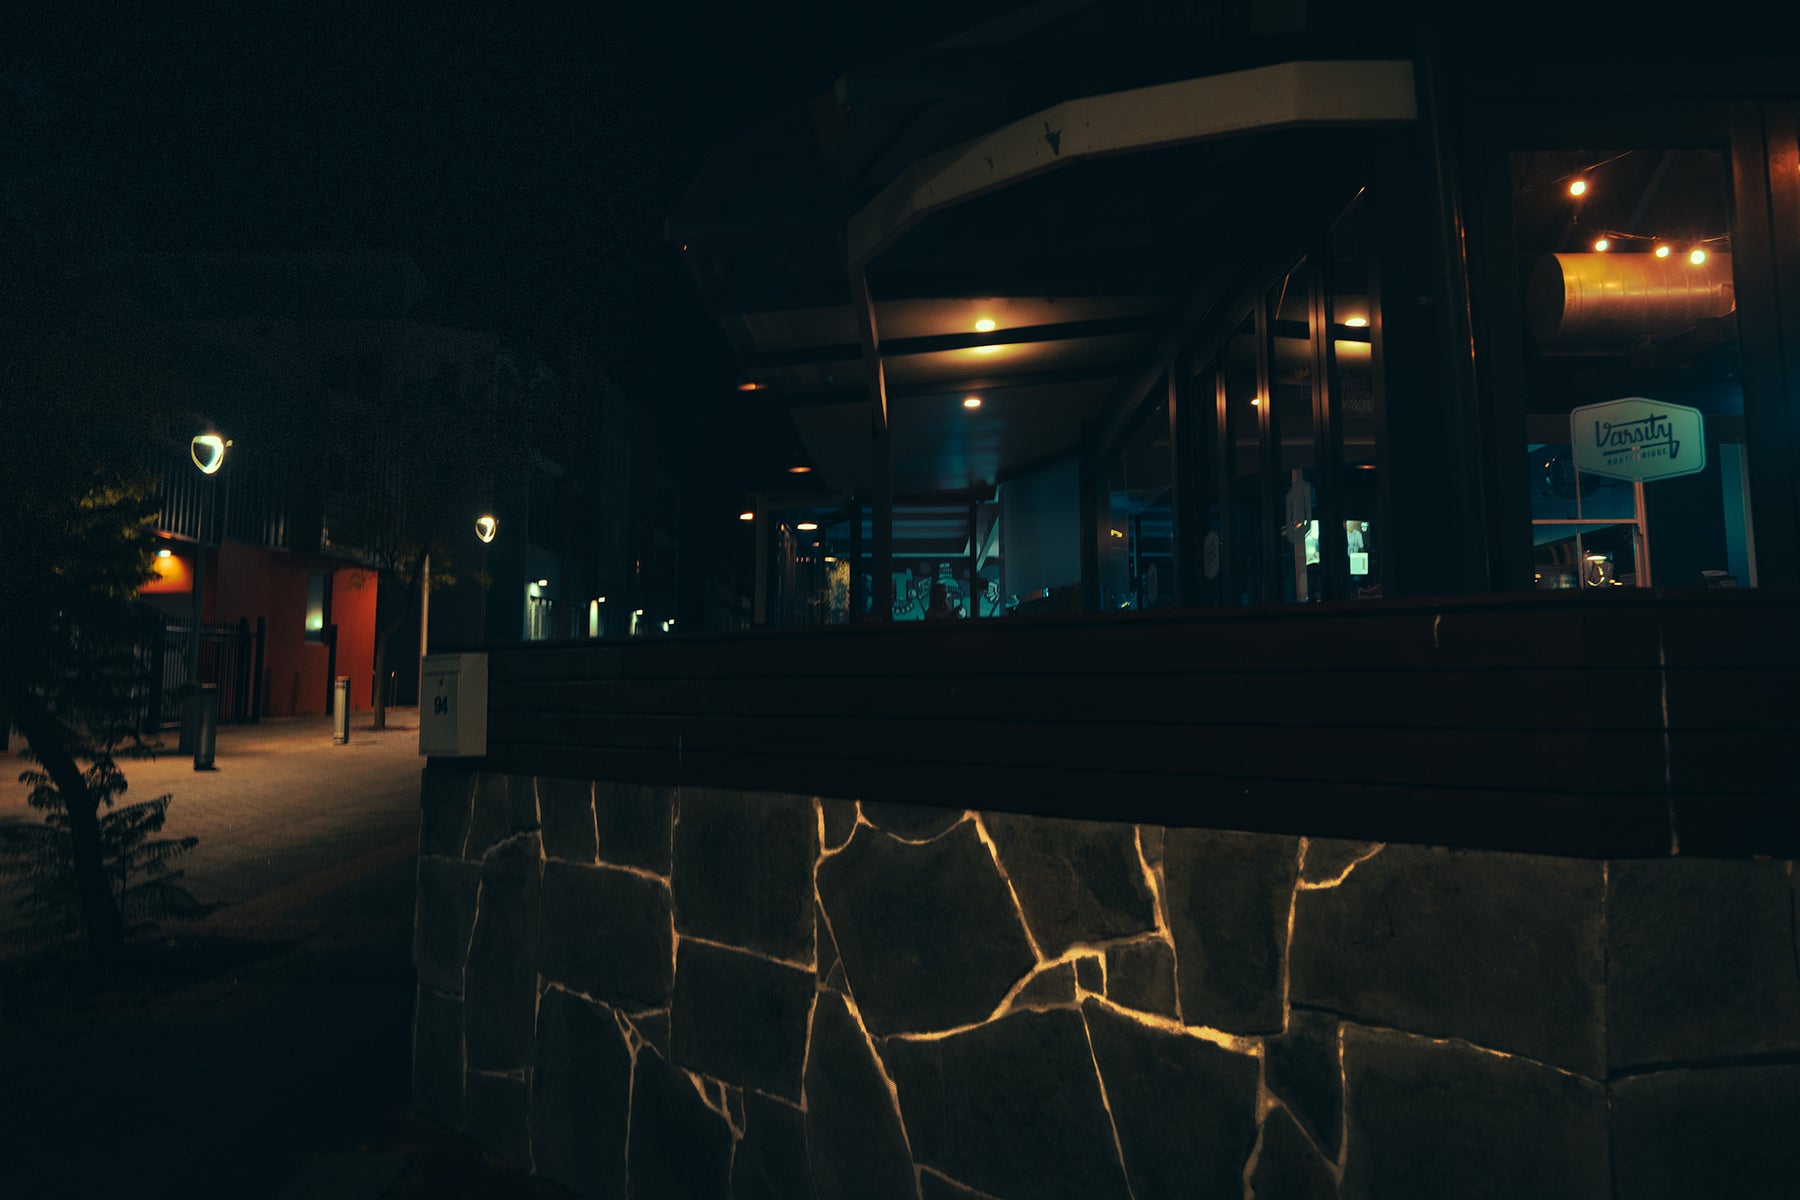
The before & after photo displays the editing results of transforming a regular photo into a cinematic image. The first step is to darken the photo until is gives a nice cinema mood feel. The light illuminating from the lightbulbs are a strong whitish colour with a hint of yellow. The aim with the bright lights is to change the colouring to an orange yellowish colour that will set the vibe. the crack in the wall forms part of the white areas of the photo so it's ideal to apply an orange tint.
The pre-existing blue lights is the reason for the successful cinematic transformation. The area of the blue lights are naturally darker than the orange counterparts providing the perfect contrasting effect. After altering the blue lights to teal the cinematic edit requires no further actions - the story is now complete.
Before & after


Dust & Scratches
A beautiful visual is taking a cinematic photo and adding a time machine effect - this effect involves digitally adding dust and scratches to the photo to create a remarkable vintage look. This dust and scratches effects can be created using photoshop or alternatively purchased on online via websites like Etsy and applied in a photo editing software.
This is an amazing trick to have up your sleeve ready to use when the correct situation arises. This is a perfect match for photos that contain vintage style objects, i.e. buildings with old architecture, out of fashion clothing, or vintage cars.
Video
Nothing screams cinematic more than a hero in a move who narrowly escapes a burning building that explodes into a fireball , while all of this is projected and wrapped in slow motion. Slow motion can make even the cutest of cat videos look cinematic.
The video below starts off at normal speed then slows down to 960 frames per second than picks up normal speed towards the very end. An orange and green filter was added in the editing process to provide a dramatic look. The teal was substituted for a more slightly green colour as it provided a better fit for the scene.
The ultimate icing on the cake is taking a scene/video that involves high speed action and combining this with slow motion. This allows the viewer to see intricate details that they would otherwise not see with the human eye scanning the scene at normal speed.
Thank you for your time and effort :)
Comment below to share your opinion or ask a question.

